
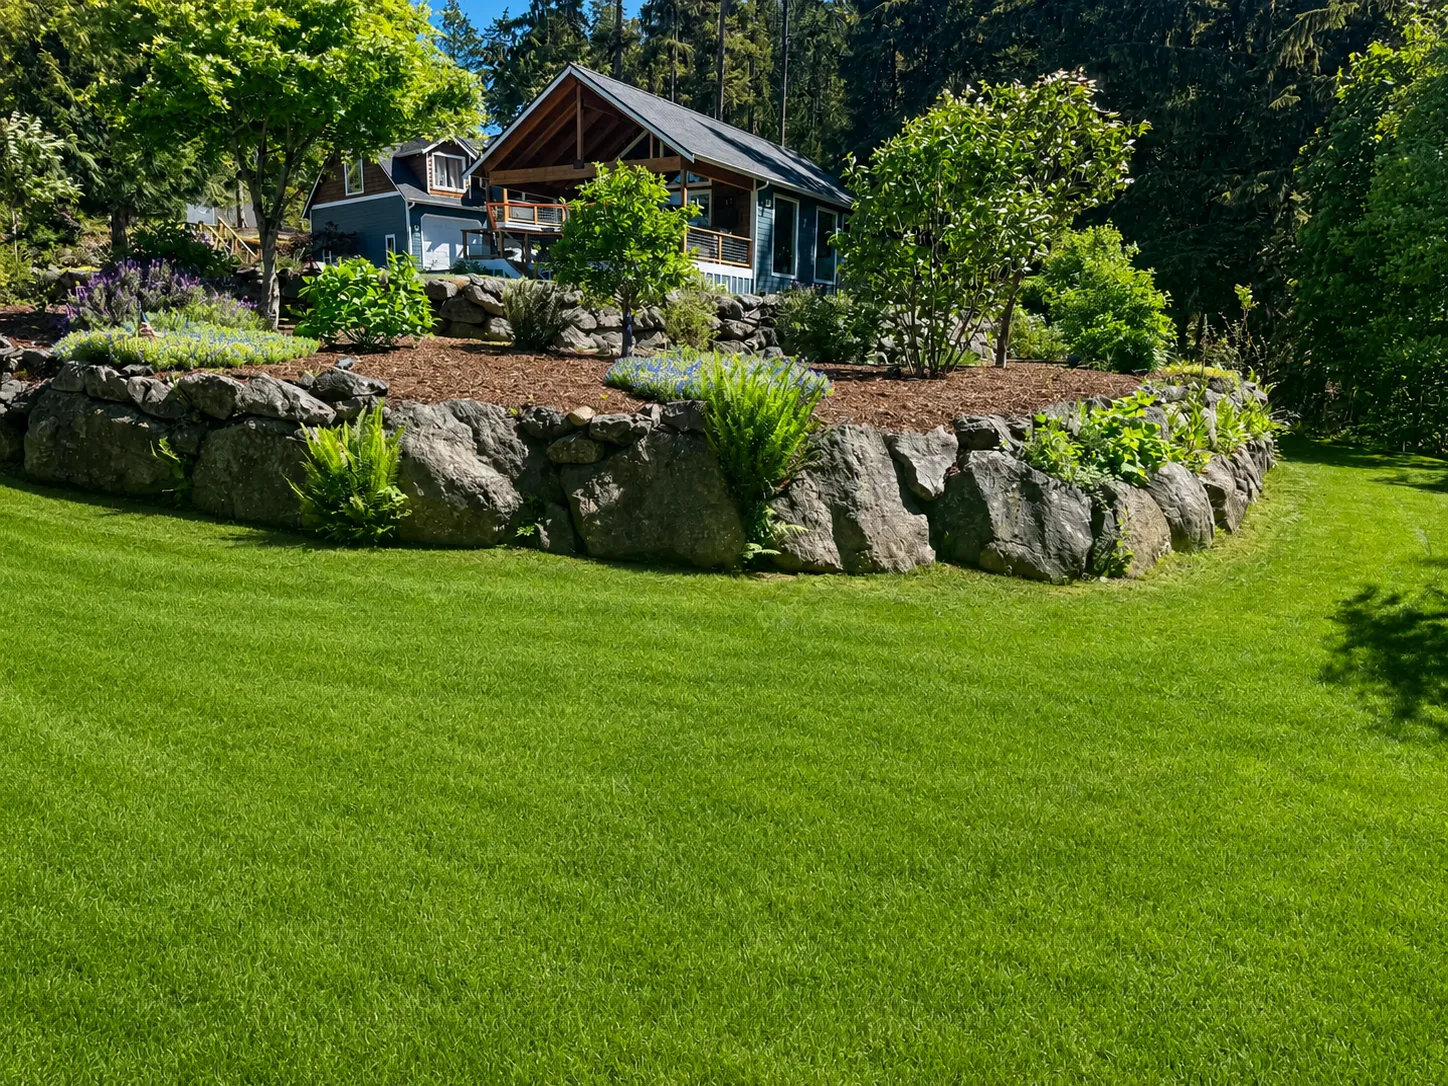
Choose the wall for what it holds back
A small flower-bed border and a wall supporting a driveway are different projects. Measure the full height from the bottom of the buried base course to the top; note slopes, buildings, vehicles, fences and water above it. Product limits and permit requirements apply even when the visible wall looks low. Ask for a wall design when height, soil or added loads require it.
| Wall type | Best starting question |
|---|---|
| Small decorative garden block | What is this exact product’s limit on my soil and slope? |
| Full-size hand-set segmental block | Does this height or load require reinforcement behind it? |
| Large excavator-set concrete block | Which block depths, pad and lifting system does the design specify? |
| Natural boulder wall | How will stone size, buried support and stable bearing be selected? |
Small decorative blocks: low garden walls
- Select a rated garden-wall product. Do not use decorative edging units to retain a driveway, steep bank or building area.
- Dig a level trench and prepare the base. The manufacturer may require only a few inches of compacted granular base for a particular low-wall product; use its exact depth and buried-course requirement.
- Set the first course carefully. Level front-to-back and along the wall. Step the base up a slope in full course increments instead of tilting the blocks.
- Build and backfill together. Stagger joints and use the product’s connections or adhesive instructions. Place the specified drainage stone and firm backfill progressively.
- Finish water management. Shape the top to keep runoff from collecting behind the wall. Drain-pipe requirements depend on product and site.
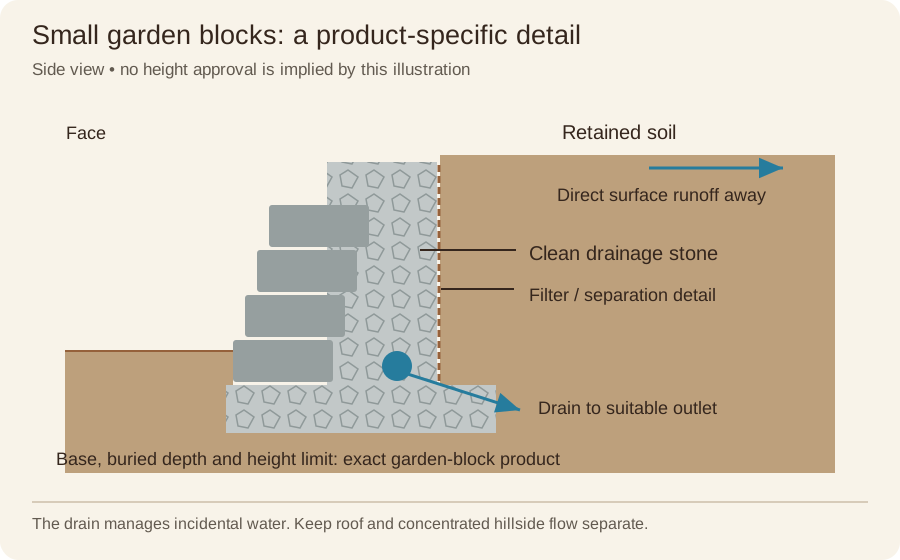
For scale, Allan Block’s garden guide specifies a 2-inch base for its Garden Accent example and a 4-inch base for AB Junior. Those different dimensions show why there is no single base depth for every “small block.” Read the limits for the actual product.
Full-size segmental blocks: compact as you build
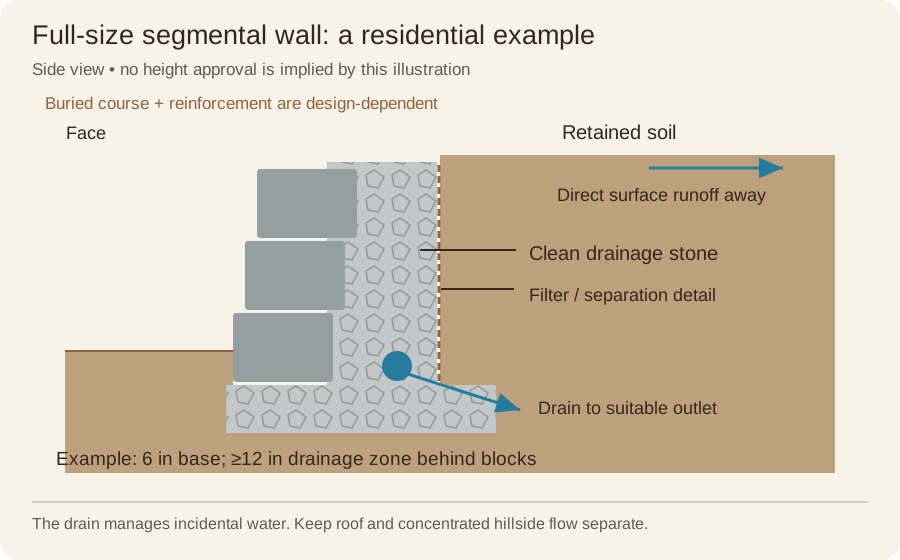
A common residential system uses a compacted granular leveling pad, a buried first course, clean wall rock behind the face and a drain with an outlet. An Allan Block example uses a 6-inch base and at least 12 inches of wall rock behind the blocks. These are system examples; embedment, reinforced soil length and wall height remain design-dependent.
- Seat the base course. Check every block for level and alignment; small errors multiply as the wall rises.
- Fill cores and drainage space as specified. Keep soil from contaminating the clean stone. Use the system’s separation/filter details.
- Backfill in controlled lifts. Compact the required area as each course is built, using small equipment near the wall face and the manufacturer’s method. Never stack the whole wall and then dump all the fill behind it.
- Install geogrid where designed. Length, direction, elevation and soil anchorage are specified; landscape fabric is not geogrid.
- Cap and control surface water. Maintain a suitable outlet and keep roof or concentrated hillside flow separate from the wall’s toe drain.
Large concrete blocks placed with an excavator
Large precast units rely on a designed combination of weight, depth, setback and, in some systems, reinforcement. More weight does not remove the need for drainage and stable ground. Use the manufacturer’s wall design and rated lifting attachment; keep people clear of suspended blocks.
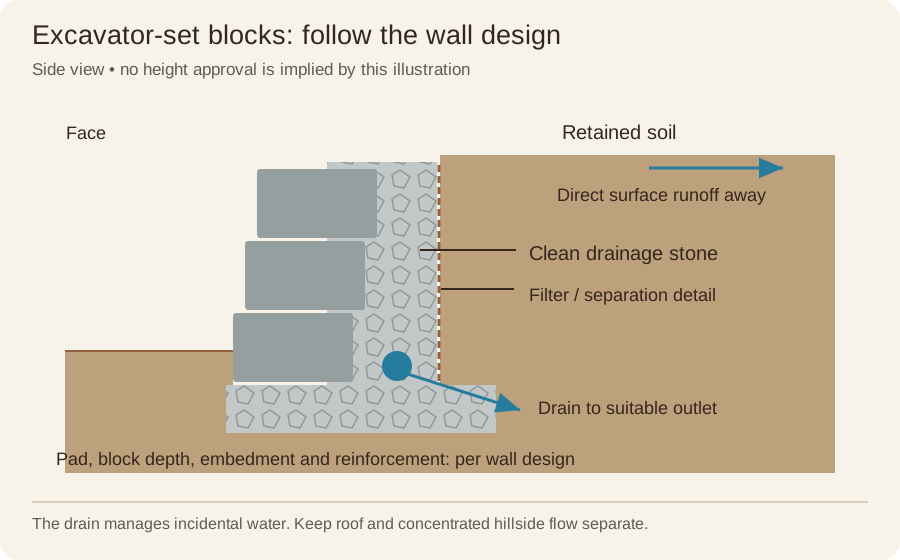
Excavate to suitable support, install the specified leveling pad and check the first row carefully. Set subsequent blocks in the intended bond and engage their connections. Place drainage aggregate and compact approved backfill progressively. Redi-Rock designs can use different pad materials and dimensions; do not substitute the garden-wall detail. Obtain a block schedule that includes base, standard, top, corner and any reinforced units.
Natural boulder walls
Choose durable stones with useful bearing faces and enough depth to reach into the bank. Embed substantial foundation stones in prepared support, lean the face back as designed and overlap joints. Each stone needs stable contacts; small loose wedges and soil stuffed into gaps are not dependable structural support.
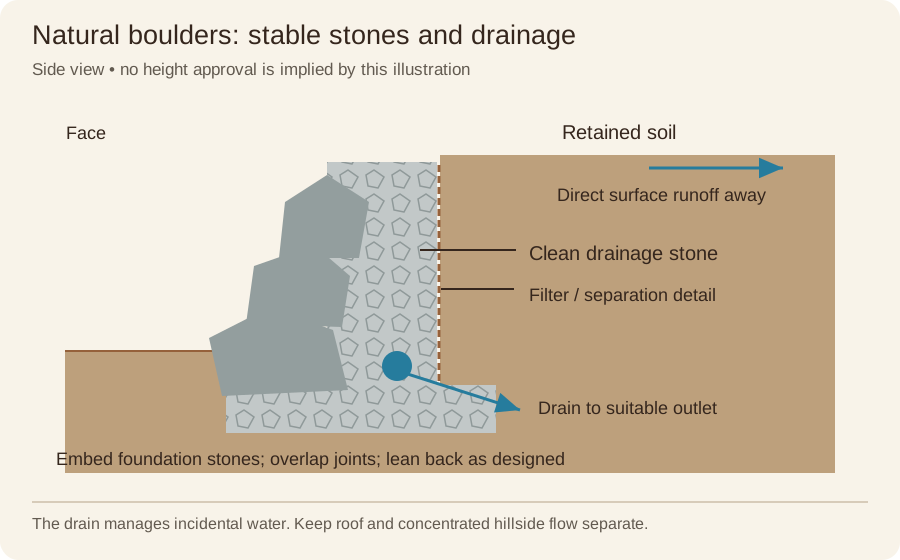
Place the drainage zone and suitable backfill as stones are set. Keep fine soil from washing into open voids. Stone size, wall batter, base width and buried depth need site-specific selection. Irregular rocks cannot be safely counted by dividing wall area by an average face size.
Drainage, stairs and terraces
Drainage aggregate and a toe drain manage water entering behind the wall; they should not be the main route for roof runoff or a hillside stream. Keep the outlet accessible. Two short walls close together can act like one taller system because the upper wall loads the lower one. A stair cut through a wall needs planned side supports and consistent risers, not blocks removed after construction.
Use your own measurements and adjust the product assumptions before ordering.
Open the walls calculator →Common failure clues
- A bulging face, opening joints or leaning blocks.
- Water staining, soil washing out or a blocked drain outlet.
- Settlement behind the wall or a sunken first course.
- New vehicle, fence or patio loads added without checking the wall.
Keep people away from a visibly moving wall and get it assessed before excavation or removal.
Further reading & product instructions
Residential resources used for these explanations. Follow the instructions for the product you actually choose.