
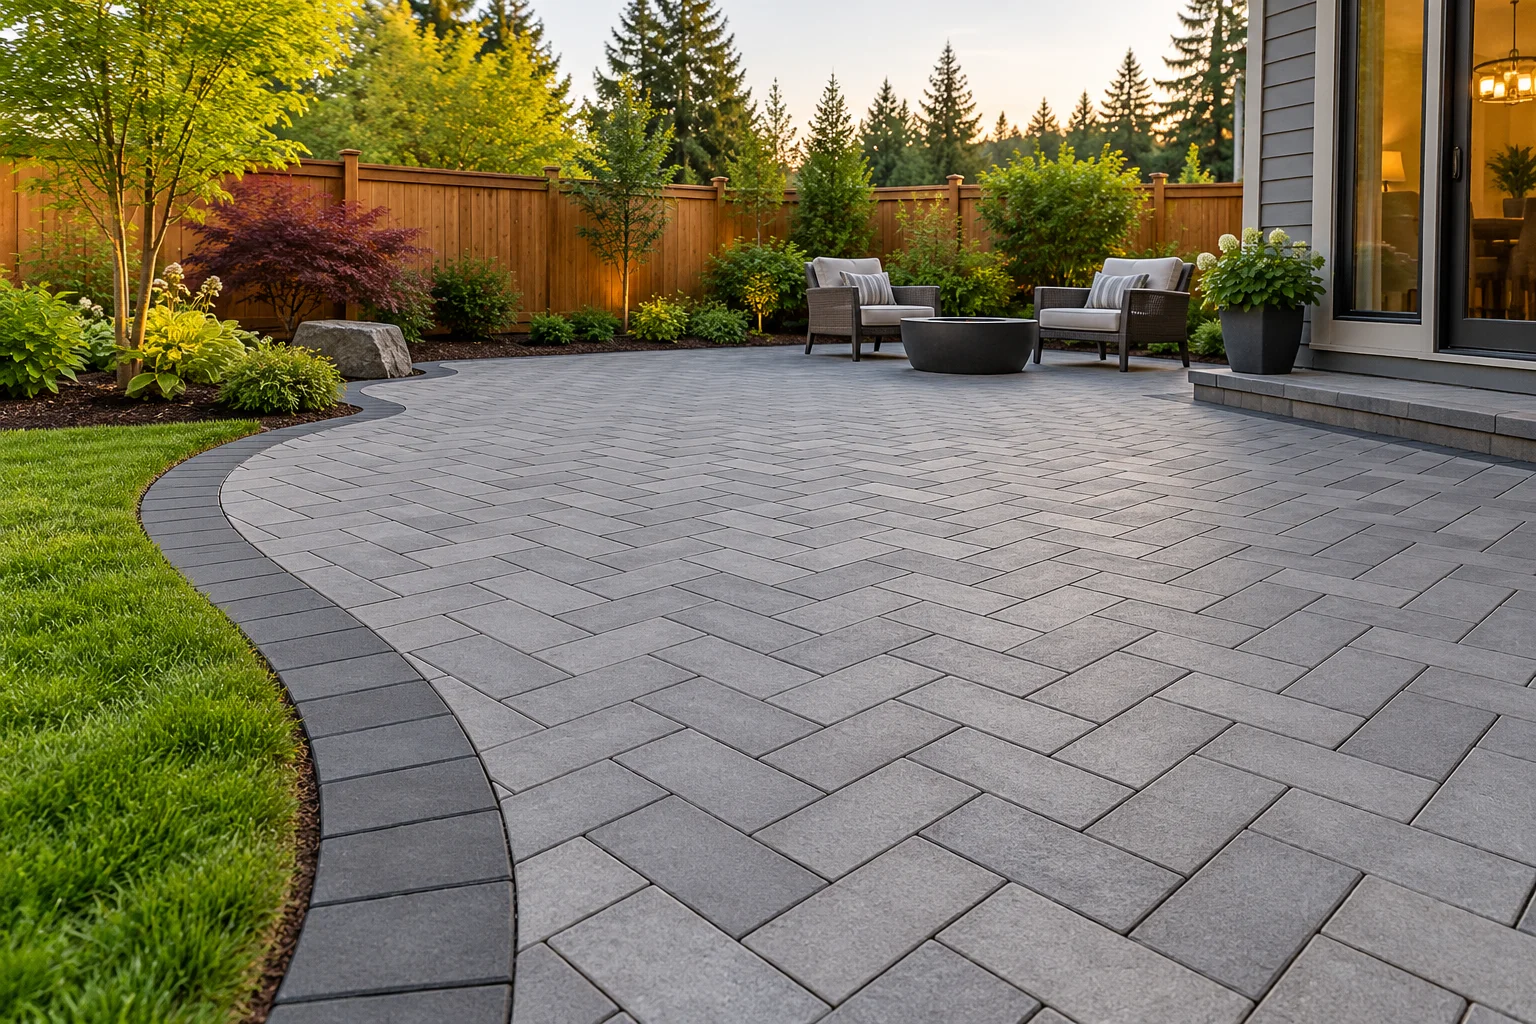
Lay out the finished surface first
Choose pavers rated for the intended use; a patio slab is not automatically rated for vehicles or plate compaction. Mark finished height at doors, steps and walls. Set a consistent fall toward a suitable drainage area. A 2% example slope falls 2.4 inches in 10 feet; the actual layout must suit drainage and access needs.
This guide shows a conventional sand-set concrete or clay paver system. Permeable pavers, porcelain and concrete overlays use different bedding, joints and base details—follow those product systems instead of mixing methods.
Build the layers in order
- Mark and square the layout. Use stakes, string and diagonal measurements for straight areas. Use a hose or flexible edging to preview curves. Dry-lay a short row with joints to see where cuts will land.
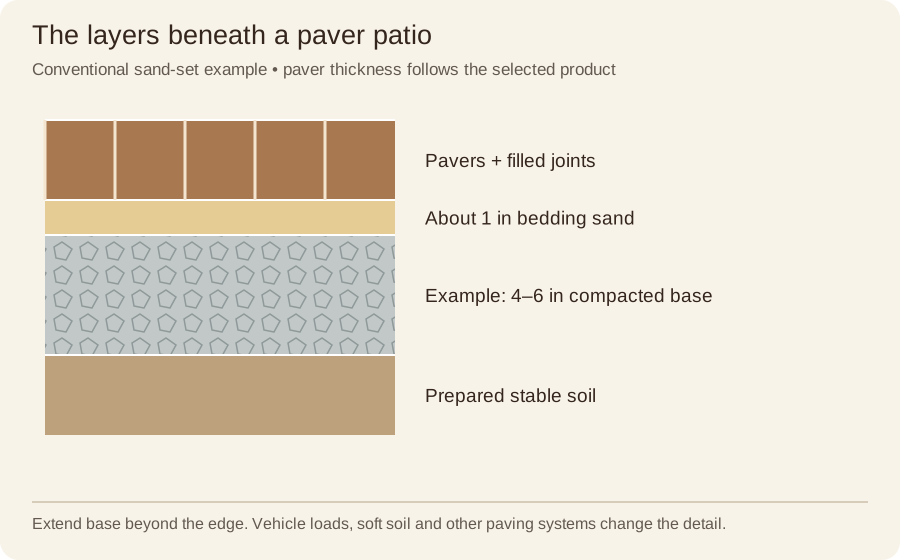
- Remove vegetation and topsoil. Dig to firm ground and allow for paver thickness, bedding and the full base depth. Extend the prepared base beyond the paver edge enough to support the chosen restraint.
- Prepare the subgrade. Correct soft spots, shape drainage and compact suitable soil. Add separation geotextile if the soil and specified system call for it.
- Place the base in thin lifts. A common residential patio example uses 4–6 inches of compacted graded crushed aggregate; poor ground and vehicle loads may need more. Compact each lift with appropriate moisture and equipment. Keep the surface parallel to the final slope.
- Screed the bedding. For a conventional system, use about 1 inch of suitable bedding sand, set with screed rails. Remove rails and fill their grooves. Do not use thick sand to hide hollows in the base.
- Lay the pattern. Work from completed paving, keep lines aligned and blend pavers from multiple packs if the manufacturer recommends it. Maintain the specified joints.
- Cut and restrain. Mark curved cuts carefully; avoid tiny slivers at edges. Use appropriate wet cutting or dust extraction and protection. Install the selected edge restraint on the correct supporting base.
- Fill joints and finish. Use the specified joint sand and compaction sequence. Some slabs require a protective mat or different compaction method. For polymeric sand, follow the product’s cleaning, watering and cure instructions exactly.
Plastic or concrete edge restraint?
| Method | Advantages | Tradeoffs |
|---|---|---|
| Purpose-made plastic paver restraint | Quick, adjustable and available in straight or flexible sections; no concrete cure. | Needs the right stakes and firm extended base. Generic lawn edging is not a substitute. |
| Concrete or engineered troweled restraint | Continuous support and a shape that follows curves; some reinforced products suit several base systems. | Needs proper mix, shaping and curing. Repairs are harder; ordinary concrete may crack. Preserve the paving system’s drainage. |
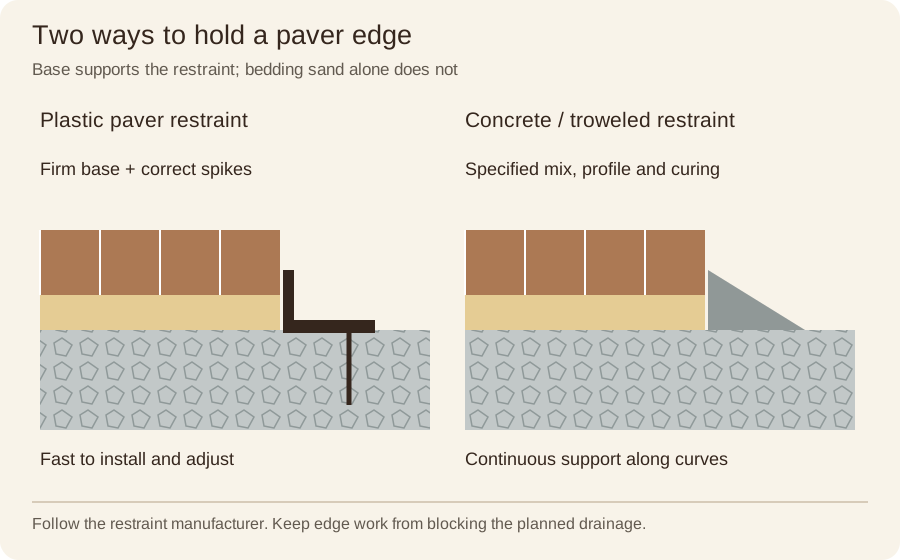
Do not fasten plastic into loose bedding sand and expect it to hold. Do not cover drain outlets with a concrete edge. Reinforced proprietary restraints are not identical to ordinary bagged concrete; use their own instructions.
Straight lines, curves and pattern cuts
Establish a reliable baseline along a building or independent string line and check squareness before laying hundreds of pieces. Keep checking rows against the string instead of assuming the last row is straight. For curves, lay the main pattern slightly past the intended line, mark a smooth arc and cut to a planned border. Buy a cutting allowance; curved and diagonal layouts generally create more waste than simple rectangles.
Tie into a wall or stairway
Set the wall and stair layout before finishing adjacent pavers. Align the final paver level with the planned stair riser so the first or last step does not become unexpectedly tall. Keep all risers consistent and use the stair system’s tread, footing and connection details.
A retaining wall supporting a patio carries the patio’s added load; it must be designed for that use. Do not attach pavers to a wall cap as improvised edge restraint, bridge an uncompacted trench, or block the wall’s drainage. Confirm any separation joint at buildings or rigid structures with the selected installation detail.
Use your own measurements and adjust the product assumptions before ordering.
Open the pavers calculator →Maintain the patio
Keep joints filled, remove weeds early and use a cleaner compatible with the paver. Avoid aggressive pressure washing that strips joint material. If an area settles, lift the pavers and repair the support beneath them rather than burying the dip beneath more joint sand.
Further reading & product instructions
Residential resources used for these explanations. Follow the instructions for the product you actually choose.